Automotive 3D Scanning Services for Component Inspection & Reverse Engineering
Ensuring safe and properly functioning automotive assemblies has previously required extensive scanning and testing. The process is usually expensive and can be destructive to the assemblies being scanned. In fact, scanning an assembled system for defects has been nearly impossible with traditional line-of-sight laser and light scanning due to line of sight restrictions.
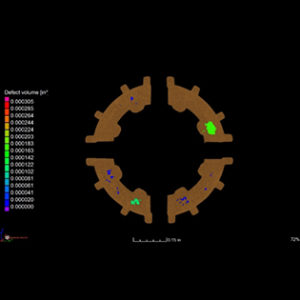
Utilizing the newest technologies in industrial Computed Tomography (CT) scanning, 3D Engineering Solutions can offer the most extensive, non-destructive scanning practices in the U.S. We are the first CT scanning ISO 17025-certified facility in the country. Our CT scanning devices use thousands of X-rays and compile the data into a 3D voxel model structure that can represents the entire assembly – internal and external.
These advantages bring immediate benefits to your manufacturing process. The ability to scan assembled subassemblies ensures functionality far beyond other scanning methods. Possible issues can be detected in the assembly as opposed to scanning each individual part separately. And the act of disassembling parts can be damaging as well.
Considering the inspection advantages of this method, our ability to detect thin walls, voids, and defects has never been so thorough. An analysis from an ISO 17025-certified third-party are required for certain safety inspections, and 3D Engineering Solutions is capable of performing these highly specialized tests.
As industrial CT scanning technology has continued to grow, turn-around has vastly improved. With the ability to scan entire assemblies, time has also been cut dramatically and costs are better managed. With our industrial CT center of excellence, this exciting technology has never been so accessible and beneficial for your automotive manufacturing needs.
Component Design and Manufacturing
3D Engineering Solutions provides scanning and reverse engineering services for automotive component design and manufacturing. Our metrology lab handles the complete process from data collection through final CAD deliverables.
Reverse Engineering Automotive Parts
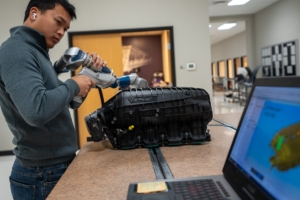
Our reverse engineering process captures the geometry and dimensions of physical automotive components using multiple scanning technologies. We employ laser scanning, blue light / white light scanning, photogrammetry, CMM touch probes, and industrial CT scanning depending on part size, complexity, and required accuracy. This data collection produces point clouds that our degreed engineers convert into fully parametric CAD models.
These models support several manufacturing applications. Companies use our reverse-engineered models to replicate discontinued parts, make design improvements to existing components, or create manufacturing documentation where original CAD files no longer exist. Our ISO 17025 certification provides the measurement traceability needed for quality-critical automotive work.
CAD Model Development
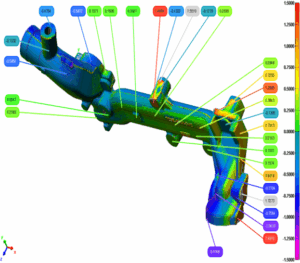
Our engineers create CAD models by comparing scan data directly to the CAD geometry using scan-to-CAD analysis. This verification confirms the digital model accurately represents the physical part before we deliver files.
The models we produce work directly in product development and manufacturing environments. Engineering teams use them for fit analysis, design modifications, and as references for production tooling.
Tool and Die Scanning
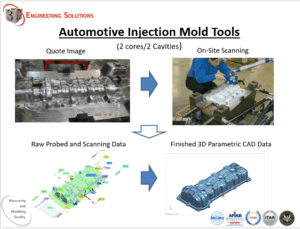
Our scanning services extend to tools and dies used in automotive manufacturing. We scan stamping dies, injection molds, and other production tooling to capture their current geometry. This data helps manufacturers verify tool dimensions, document wear patterns, or digitally repair damaged tooling. Surface models created from tool scans can be used to regenerate tooling when the original has broken or worn beyond acceptable limits.
How We Work
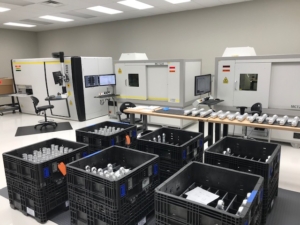
3D Engineering Solutions operates a 24,000-square-foot metrology lab and training center in Cincinnati, Ohio, with convenient access to I-75 and I-275. Our temperature-controlled facility houses industrial CT scanners, 7-axis articulating arms with laser scanning capabilities, CMM equipment, and related inspection technologies.
We hold ISO/IEC 17025 certification for our metrology work. This accreditation addresses both management requirements and technical competence covering staff qualifications, methodology, and calibration of test equipment. Our certification allows us to perform dimensioned inspections and produce certifiable reports that meet industry audit requirements.
Our Equipment and Capabilities
The facility includes a 10,000-square-foot temperature-controlled lab space and 14,000-square-foot warehouse equipped with multiple loading docks and forklift capacity to 6,000 pounds. We maintain multiple pieces of equipment for each scanning technology – laser scanning (long-range and short-range), white light scanning, photogrammetry, confocal white light scanning, touch probe CMM, industrial X-ray, and industrial CT scanning.
Our four Nikon X-ray and CT systems support both single-sample analysis and high-volume production runs. All staff members are degreed engineers and NAS410 certified in CT scanning, trained in each technology and software platform we operate.
Engineering Services
We provide data collection, 3D modeling, and engineering services across multiple industries including aerospace, automotive, tool and die, manufacturing, and medical devices. Our reverse engineering team creates CAD models in Siemens NX, SolidWorks, Creo, and Revit. We perform inspection services, First Article Inspections (FAI), dimensional measurement, and non-destructive testing.
The team combines more than 100 years of manufacturing and design experience. Our background includes strategic quality assurance management, repair and overhaul operations, and expert witness consulting. We hold both a Federal Firearms License (Type 07 Manufacturer FFL) and Federal Explosives License (Type 20 manufacturer FEL), and maintain ITAR registration with U.S. citizen-only staff.
Service Approach
We offer 24/7 availability for time-sensitive projects. Our mobile technologies allow on-site data collection when components cannot be transported to our facility. We quote projects within one business day based on scope, timeline, and specific technical requirements.
Frequently Asked Questions
Can you scan assembled automotive components without disassembly?
Yes. Our industrial CT scanning captures complete 3D data of assembled automotive components without requiring disassembly. The CT process uses multiple X-ray scans to create a 3D voxel model showing both internal and external features. This non-destructive approach prevents damage that can occur during disassembly and reveals issues within the assembled state that might not be visible when components are separated.
What types of defects can CT scanning detect in automotive parts?
Our CT scanning detects thin walls, voids, and internal defects throughout automotive assemblies. Because the technology captures data from the entire assembly, not just external surfaces, we can identify issues that traditional line-of-sight scanning methods cannot reach. This includes porosity, cracks, and dimensional variations in areas hidden by other components.
Do you provide ISO 17025-certified inspection reports for automotive applications?
Yes. 3D Engineering Solutions is an ISO 17025-certified facility, the first CT scanning facility in the country to hold this certification. We provide certified inspection reports that meet requirements for third-party verification in safety-critical automotive inspections. Our NAS410-certified staff can deliver the documentation needed for quality assurance and regulatory compliance.
What scanning methods work best for automotive components?
The right method depends on your specific requirements. Our industrial CT scanning works well for assembled components and complex internal geometries. For external surfaces and large automotive structures, we use laser scanning, blue light / white light scanning, or CMM touch probe methods. Our degreed engineers evaluate each project to recommend the most appropriate technology based on part size, required accuracy, and inspection goals.
How long does automotive CT scanning take?
Turnaround depends on part size, complexity, and the scope of inspection required. Our four Nikon CT systems and multiple scanning technologies allow us to handle both rush projects and high-volume work. We offer 24/7 service for time-sensitive automotive manufacturing needs. Contact us with your specific requirements for an accurate timeline.

