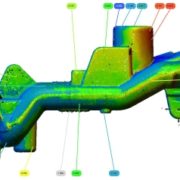
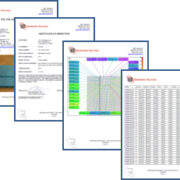
Non-Contact Thickness Measurements: Revolutionizing 3D Engineering Solutions
In engineering, accurate and efficient thickness measurements ensure the quality of various materials and products. Non-contact thickness measurement refers to the process of determining the thickness of a material without physically touching it. Compared to contact measurements, this cutting-edge approach avoids damage to components, eliminates the need for sample preparation, and enables faster and more efficient measurements. Non-contact thickness gauges utilize advanced technologies, including lasers, ultrasonic sensors, and optical techniques, to precisely measure the thickness of a wide range of materials, from thin films to thick substrates. The following sections will explain the basics of this measurement process and its impact on engineering solutions.
Laser Distance Sensors: High-Precision Thickness Gauges
Laser distance sensors have become increasingly popular for non-contact thickness measurements due to their exceptional accuracy and versatility. These sensors emit a focused laser beam onto the surface of the measured material. The laser light is then reflected back to the sensor, which calculates the thickness based on the time-of-flight principle or the triangulation method. Laser sensors offer high-resolution measurements, typically in the micrometers or even nanometers range, making them ideal for applications requiring precise thickness control.
Potentially add in a section talking about the details of ultrasonic thickness measurements
Applications and Benefits of Non-Contact Thickness Measurements
Non-contact thickness measurements find extensive applications across various industries, including:
- Automotive
- Aerospace
- Electronics
- Manufacturing
These measurements are essential for quality control, process optimization, and product development. By accurately measuring the thickness of materials without contact, engineers can ensure consistent product quality, detect defects or variations, and optimize manufacturing processes.
Non-contact thickness measurements have revolutionized 3D engineering, providing high-precision solutions for accurate thickness control. Laser measurement sensors, in particular, are powerful tools for measuring the thickness of materials without physical contact, offering exceptional accuracy and versatility. As the demand for precise and efficient thickness measurements grows, non-contact thickness gauges will undoubtedly play a crucial role in shaping the future of 3D engineering solutions.
Where Innovation and Expertise Converge: 3D Engineering Solutions
At 3D Engineering Solutions, we are dedicated to delivering exceptional advanced engineering metrology services with unparalleled precision and speed. Our commitment to detail is evident in every aspect of our business—from our top-notch service to our highly skilled team and the cutting-edge technology we employ.
Our advanced engineering metrology services have far-reaching applications across various industries, including aeronautics, motion picture and gaming, automotive, tool and die, manufacturing, forensics, archaeology, medicine, and maritime. Wherever precision digital 3D modeling is required, 3D Engineering Solutions will meet your needs.
At 3D Engineering Solutions, we take pride in delivering advanced engineering metrology services that exceed expectations. With our dedicated team, cutting-edge technology, and unwavering commitment to excellence, we are your trusted partner for all your precision digital 3D modeling requirements. Contact us today to get started!
Frequently Asked Questions (FAQs)
How do you measure thickness with a sensor?
Thickness can be measured with a sensor using non-contact methods such as laser triangulation or time-of-flight techniques. The sensor emits a laser beam or ultrasonic wave onto the material’s surface, and by analyzing the reflected light, it calculates the thickness based on the distance traveled by the laser or the angle of reflection. This allows for precise thickness measurements without physically touching the material.
What is the unit for thickness?
The unit for thickness is typically expressed in millimeters (mm), micrometers (μm), or nanometers (nm), depending on the scale and precision required for the specific application. Non-contact thickness gauges can measure these units, offering high-resolution data for accurate thickness control.
What is the most accurate way to measure thickness?
Non-contact thickness measurement techniques, such as those using laser sensors or ultrasonic waves, are considered the most accurate way to measure thickness. These methods provide high precision measurements without the need for physical contact, eliminating potential errors or variations caused by surface irregularities or material deformation. Laser measurement sensors or ultrasonic sensors can achieve accuracy in the range of micrometers or even nanometers, ensuring reliable and consistent thickness measurements.
What device is used to check thickness?
Non-contact thickness gauges are the devices used to check thickness without physically touching the material. These gauges employ advanced technologies like laser sensors, ultrasonic sensors, or optical methods to measure various materials’ thickness accurately. They offer high precision, fast measurement speeds, and the ability to measure a wide range of thicknesses, making them essential tools for quality control and process optimization in 3D engineering applications.

