The Basics of Surface Finish Measurement
Surface finish is a measure of a material’s surface texture and characteristics. It encompasses three main components: roughness, waviness, and lay, which are crucial in determining the quality, functionality, and aesthetics of a product. Roughness refers to the finer irregularities on the surface, typically caused by the manufacturing process, such as cutting, grinding, or polishing. Waviness, on the other hand, describes the more widely spaced variations on the surface, often resulting from vibrations or deflections during manufacturing. Lay is the predominant direction of the surface pattern, which can be influenced by the manufacturing method employed. Understanding and measuring surface finish is essential for engineers and manufacturers to ensure that their products meet required specifications and perform optimally. The coming sections will delve into the basics of surface finish measurement and its importance in the engineering processes.
Why is Surface Finish Important in Engineering Processes?
Surface finish plays a vital role in various aspects of engineering, including:
- Functionality: A component’s surface finish can significantly impact its functionality. Smooth surfaces reduce friction and wear, while rough surfaces provide better adhesion or grip.
- Durability: A well-controlled surface finish can enhance a component’s durability by minimizing stress concentrations and improving resistance to corrosion and fatigue.
- Aesthetics: In many applications, such as consumer products, surface finish contributes to the appearance and perceived quality of the product.
- Assembly: The surface finish of mating components can affect their fit and alignment, influencing the performance and reliability of the assembled product.
How to Measure Surface Finish
Surface finish measurement involves quantifying the surface texture of a material. There are several methods and tools available for measuring surface finish, including:
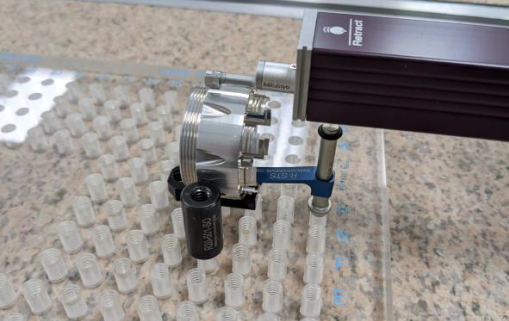
- Stylus Profilometers: These instruments use a stylus that physically contacts the surface and traces its profile. The stylus moves across the surface, and its vertical displacement is recorded to generate a 2D surface texture profile.
- Optical Profilometers: Non-contact optical methods, such as white light interferometry or confocal microscopy, use light to measure surface topography. These techniques provide high-resolution 3D surface maps without physically contacting the surface.
- Comparison Plates: Surface finish comparison plates, also known as surface roughness standards, provide a visual reference for comparing the surface finish of a component against a known standard. These plates feature a range of surface finishes that can be visual or tactile compared to the sample surface.
Understanding Surface Roughness Charts
Surface roughness charts are visual representations of different surface finishes, typically arranged in order of increasing roughness. These charts help engineers and technicians quickly identify and specify the desired surface finish for a particular application. Common surface roughness parameters include Ra (average roughness), Rz (average maximum height of the profile), and Rq (root mean square roughness). Each parameter provides a different perspective on the surface texture and is selected based on the application’s specific requirements.
Surface finish measurement is a critical aspect of engineering that ensures the quality, functionality, and aesthetics of manufactured components. Engineers can make informed decisions in design and manufacturing processes by understanding the basics of surface finish, including its components, importance, and measurement techniques. Whether using stylus profilometers, optical methods, or comparison plates, accurate surface finish measurement is essential for producing high-quality products that meet the demands of various industries.
Precision, Passion, and Partnership: 3D Engineering Solutions
At 3D Engineering Solutions, we are dedicated to delivering exceptional service, employing the best engineers, and utilizing cutting-edge technology to provide advanced engineering metrology solutions. Our commitment to detail is unwavering, and we strive to exceed client expectations in every aspect of our work.
We pride ourselves on providing fast, efficient, and cost-effective solutions. Our state-of-the-art digitization technologies and high-end point cloud engineering software enable us to capture and process up to 1,000,000 points per second, ensuring quick turnaround times without compromising on quality or precision. Our services have applications across various industries, including aeronautics, motion picture and gaming, automotive, tool and die, manufacturing, forensics, archaeology, medicine, and maritime – wherever precise digital 3D modeling is required.
Your success is our top priority, and we are committed to utilizing superior communication, attention to detail, high-quality standards, and innovative technologies to fulfill your quality and engineering needs. Choose 3D Engineering Solutions for advanced engineering metrology services that consistently deliver excellence.
Frequently Asked Questions (FAQs)
What unit of measure is surface finish?
Surface finish is typically measured in nanometers (nm) or microinches (μin). These units represent the surface’s average roughness (Ra), which is calculated by measuring the vertical deviations of the surface from its mean line.
How do you check the surface finish of metal?
To check the surface finish of metal, you can use various methods, such as visual inspection, tactile comparison against surface roughness standards, or employing surface measurement instruments like stylus profilometers or optical profilometers. These tools provide quantitative measurements of the surface roughness parameters, enabling accurate assessment of the surface finish.
What is a surface finish measurement tool?
A surface finish measurement tool is an instrument used to quantify the surface texture of a material. Common tools include stylus profilometers, which use a tiny precision stylus to trace the surface profile, and optical profilometers, which utilize non-contact methods like white light interferometry or confocal microscopy to measure surface topography. These tools provide detailed information about surface roughness parameters, aiding in quality control and process optimization.


Leave a Reply
Want to join the discussion?Feel free to contribute!